Monday, April 13, 2015

Thing 17: DIY

I love that we were able to complete a DIY thing during this track. It gave me to opportunity to not only explore a new tool, but find a way to promote the library by creating a PSA. Ever since I started at Lake George, I have been working hard to promote the WISE model of Inquiry. In fact last year, my aide, who is a fantastic artist, and I designed a poster for the WISE model that is now displayed in every classroom. The poster has really catapulted our student and teachers understanding of inquiry and the idea of learning how to learn. I really wanted to build on this momentum and further promote inquiry and the library. I decided that I should build a PSA for the library.

I had heard lots about PowToon and was looking for a reason to learn more about this tool. I decided that I would create a PSA using PowToons. I love how professional the videos look that are made on PowToon and was hoping that it would be intuitive. I have to say that you can easily make a basic video by dragging and dropping with this tool. However, once I got into the timing of making images pop-up and fade away it got a little tricker. I eventually learned how to use the timeline tool at the bottom, but I know that when I make my next video I will need to teach myself again. That part of the tool certainly isn't as intuitive as I would have liked.  However, I wouldn't let this stop anyone from using this tool though. It has so many great images, templates and styles to choose from and the great part is you can mix different themes together. You can add uploaded images that searches free to use and share images, unlike other tools. It also allows you to embed video and add music from a long list of quality choices. The opportunity for creativity is endless! I know that I will be using it again and am already considering opportunities for student use.

Our sixth grade team is doing a writing unit using the theme of teen activism. I can certainly see the students making PSA's for their causes as an extension to the writing unit. PowToons would be a great tool for them to use because it certainly can be differentiated for all abilities. We use I-Movie at our school for most all our video creations and I think this is a great alternative since many students do not have I-movie on their home computers. There of course is a premium option, but I feel that the free version is quite expansive and perfect for what we as a school would need.

Below is the PSA that I created for the library. I uploaded it to youtube and have embedded it on the library website. If anyone would like to use it, they are more than welcome to!


Tuesday, March 17, 2015

Track 2: Thing 15 Digital Tattoo & Digital Citezenship

The timing of this track couldn't have been more timely. I just attended to NY SS Conference in Syracuse and there was a great deal of emphasis on "news sources" and teaching students how to critically analyze information that is being presented to them in a variety of media formats by a variety of "authors". It made me realize that although I touch on this topic within many of the cross-curricular units I do with classroom teachers, I feel that I need to spend a week or even a 2 week unit on this with my upper levels. I feel that this track was perfect for wrapping my head around what I would like to design and what information and resources I feel are appropriate for my 5th & 6th graders.

I started off by reading Vicki Davis's article on "What your Students Really Need to Know about Digital Citizenship". She provided "9 Key Ps" of digital citizenship. I thought that these were nice building blocks for starting a unit myself, but I wanted to more practical tools and lesson ideas that I could use with the younger kids to teach of these "key P's". That is when I decided to look at "A Great Guide on Teaching Students About Digital Footprint". I loved how this article really laid out how you might introduce the topic and continue on with different key lessons and ideas. Although I might not use each of the videos and ideas, the article definitely provided me with the framework I was looking for to begin designing a two week lesson. I really want to have a powerful impact on my students. I want this to be eye-opening for them. So, instead of starting with the Common Sense Media clip on digital citizenship, I would start by using the youtube clip with the "Amazing Mind Reader". I feel that would create more of a shock factor for them. I would have students view this video first, as if they were close reading. Then I would have them watch it again this time I would have them annotate it with Videoant (Click this link to get the one I created to use with my class https://ant2.cehd.umn.edu/qebqvqsogs).  I would ask them to record their thoughts and questions that they have when they are watching. 

I also would want to start the unit with a question that would get them thinking about their digital footprint and then get them to see that it is way bigger than they think. I think I would use either of these questions to start the unit (before showing any videos): "If we were to look you up online what would we learn about you?" or "Is there anything online that you wouldn't want your teacher or parent to know about you ?", both of which were mentioned in "A Great Guide to Teaching Students about Digital Footprint". Then I would use the next suggested video, Youth and Media- Digital Dossier
which helps students understand that their digital footprint started when they were in their mothers womb and continues to grow throughout their life.

After giving them a background on digital footprints I would pull from the framework within the article and get them to discover their own digital footprint next. I like how in the article it suggested doing a basic Google Search first, but also listed the option of using Pipl, which I felt was very powerful.  I almost wonder if it might be worth starting this lesson by pre-searching some of the students in the class and writing facts about them on the board and tell them that I learned all this information by doing a simple Google Search on them. Then I would have them search themselves. Naturally, this would lead into a discussion on how to protect yourself, your information and your digital footprint. Although the article provided great tips, I feel like I would like to take a day or a lesson to expand on these tips. I would teach them how to change privacy settings, what the impact of posting a photo can have, etc. I don't know if I would go as far as having each students create a fake fb or social media page on their own, but it might be powerful to create one as a class.

Finally in the wrap up of the framework there is a video posted that I think would be very powerful in a high school setting, but not necessarily in an elementary. Jobs are too far in the future for them, I originally thought that I might like to find a video that would directly show the impact of their online behavior on their life today, but when searching for that I came across this video on Living in a Digital World and thought this would be a perfect segway into the conversation of digital citizenship. This topic is crucial to include in my two week unit and I could also see it fitting into the SS units in the younger grades.

After digital citizenship I would move onto digital literacy and use the plethora of resources available on Stony Brooks Digital Resource Center. If you haven't got a chance to check it out, it is amazing.

I am feeling good after exploring all of these resources and I am ready to start collaborating with classroom teachers to see where we might work this into the curriculum. I feel that this is extremely important and that students can't and shouldn't wait until high school to start thinking about it. In my mind HS is too late! Their digital footprint is already well on its way to being established. We need to equip them with the knowledge and tools way before any damage is done.

Tuesday, February 24, 2015

Thing 14:App-palooza!

What perfect timing for this "thing"! By next year our entire school will complete its 3 year rollout of a one-to-one program. Students K-4 will each have a I-Pad at school and students grades 5-12 will each have a laptop. Just this week, there was an article posted in our local newspaper and many of the comments from readers were very disheartening. I can totally relate to people being concerned about expenses, but surprisingly the comments were more about not understanding the need or educational purpose for these expensive "toys". As you can imagine, it was very refreshing to see this assignment come along where I was able to confirm the value that others see in these devices and the benefits that they can provide our young learners. As mentioned in "Ipads in the Classroom" these tools give students a voice and allows them to have quick access to resources such as dictionaries, thesauruses, automation, and information.

I could go on and on about the advantages of an I-Pad in the classroom, but what I love about this tool is that it allows students to create. Not only does it allow them to create easily, it allows for them to do it with their own voice. Currently, I have students creating commercials that answer the "EQ: If you were a colonist living in NY during the Revolutionary War would you become a loyalist or a patriot?". Students can use any tool they choose to create their commercial, which allows for student voice and choice. We used to do this project using the laptops and we have cut the time for the project almost in half by using the I-pads. Students have a huge toolbox of apps that we no longer need to teach, and as a result we spend much less time on teaching tools and more time of teaching students how to synthesize information, which "in my eyes" is a much needed skill.

As also mentioned in "Ipads in the Classroom", I-Pads are a beneficial tool to a teacher or teacher librarian in my case. Students can bring their i-pads to the library or if they are in 5th-6th grade they can use the ipads that the library has available. I have implemented i-pads in many different ways this year with the expansion of our i-pad rollout. The first thing I did was put the "Destiny Quest App" on our I-pads. Now students can be found searching for books and walking to the shelf with the I-pad to find it. The students no longer need to write down the call numbers and they now have the image of the book with them to make searching easier. Another benefit is that if the book wasn't what they were looking for they can just start their search over again, right from where they are standing. This app is not just beneficial to the students, but for me as well. I am able to help many more students in a quicker period of time with this quick and easy way of searching.

Another way I have utilized using the I-Pad in the library is that I have created QR codes that are displayed throughout the library. The QR codes create links to book trailers of various books in the library. Students can be found watching different trailers to help them decide which books to pick. This has been a great tool since there are many times throughout the day where I am in the classroom teaching and students can now get suggestions when I am not there. I have also used QR codes to remind students how to use shelf markers, the five finger rule and the book recommendation section of our library. In addition, I created a QR code tree for parents that link them to different resources that are valuable to them and their children.


There are many other ways that I have utilized the I-pad in the classroom, so you may wonder why I have selected this "thing". The main reason is in response to the "comments" in our local newspaper. I now realize that I need to help educate others on the purpose of these amazing tools. I don't want to do it in a direct way where I spell out all the advantages, but in a way where they can see the advantages of the tools. So I have chosen to create a "library in your pocket" for students and parents.

After reading Shannon Miller's blog post, I got the idea of doing a "library in my pocket" lesson for students in the beginning of the year. I always take a day in the beginning of the year to teach Symbaloo to the fifth graders who receive laptops, why not do the same thing with the I-pads?!?! The only dilemma is that I really don't want to wait until the beginning of the year, so I am thinking that I will show them how to create folders on their I-pads (if they don't know already) and we will keep adding an app for each new tool I teach them until the end of the year. So, if I teach them a new database or a new resource they can add it.
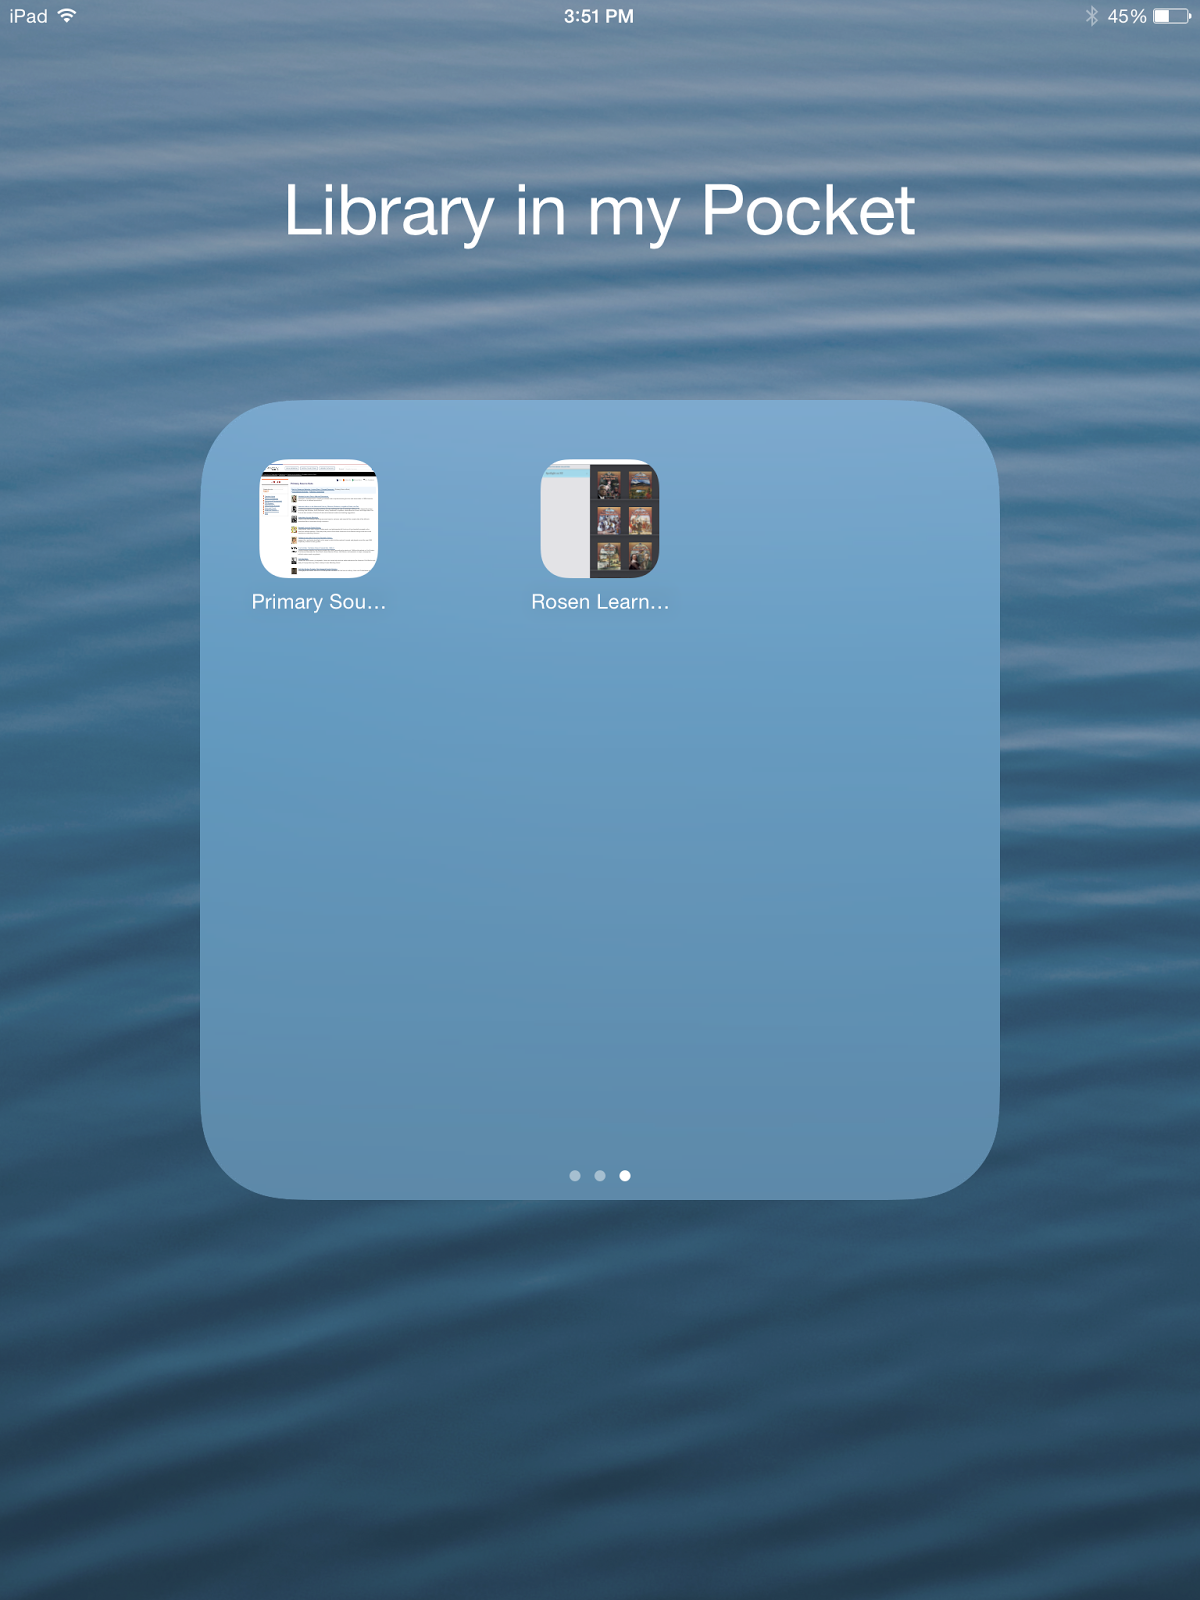
I started by creating for the student a "Library in my Pocket" folder. I added resources that were valuable for gathering information. This is what it looked like:


In the "Library in my Pocket" folder that I created I took the resources off my library website and shared the resource by choosing "Add to Home Screen" under the sharing options. This made an automatic shortcut on my screen to the resources. I then added them in a folder. I was hoping to be able to "air drop" my folders to other I-Pads, but I wasn't able to figure out how to do that yet. Does anyone know if that is possible? I am thinking it isn't possible since the apps would need to go through itunes. 

Then I thought, "How can I add more of the library to this folder and also more information for parents?". I decided to try a new resource I discovered in this "thing", called fatURL. This allows you to group several website on the same topic and create one single URL. Basically, it creates a pathfinder. So, I decided that I would make pathfinders for certain grades. For the purpose of this "Thing" I decided to put together a fatURL for the American Revolution. When creating it, I found it to be straight forward and easy to use. Once I created it, I just saved it to my home screen on my ipad and added that app to the "Library in my Pocket folder". I can see myself creating lots of these based on grade levels and topics of study.  I did experiment with the "Access myLibrary App by Gale", but unfortunately it did not pick up my library or any local libraries when trying to search. I was really bummed as I thought this would be a great tool for our students. :( Has anyone had success with this app?

In addition to the pathfinder I created with fatURL, I also thought it would be nice to add the QRcodes that I talked about earlier in the blog, so I connected to most of those videos and added them to the "Library in my Pocket" folder as well. The only problem is that it didn't always pull the icon I would have liked. I bet I could change the name under the app to add the correct name like, "five finger rule". Here is the final product of the folder (in addition to the ones above).


I feel that by creating this "Library in my Pocket" parents and students will see yet another value of these devices. It makes access to reliable information easier for students. I know this is only a subtle way of educating users and naysayers on the value and importance of these tools, but I feel if people are continually shown the potential and opportunity these devices provide/ allow then they will ultimately come to the conclusion that these are extremely valuable tools that open a whole new world of possibilities for our young leaners.  

Monday, January 19, 2015

Thing 13: Web Presence

This was one of those topics that I thought about switching to a new track. I already use Weebly (which I love), and I just recently sat with a member of our technology department to figure out how to add a live Twitter feed to my website. However, as hard as I try to make my site a "hub" where students, parents and administrators visit, I always strive to get more traffic and make it more visible and vital to the users. Therefore, I decided to stick with this track to see what new ideas and tools I could use.

At first, I clicked on the Richard Byrne's link and read over his brief summary of different options for creating websites. I was tempted to try out a new option, but thought about how I agree with Richard that Weebly is very intuitive and easy to use. Besides it is not that I don't like the layout of my website (I actually love it), it's more that I want to get more traffic to it. That's when I decided that I need to really think more about the students needs. When I really reflect on what Joyce says and the tips that are posted on the wiki for Thing 13, I worry about my site becoming a "Junkyard". I already have a student showcase section on my website for student work that I have a hard time keeping up with and although valuable, if I am not going to keep up with it, I really need to think about whether I want to keep it or get rid of it. So, when thinking about adding to my site, I want to make sure that it is something that is not only valuable, but that I can maintain.

"What will bring users to my site?" One thing that I think would make people come to my site is book reviews. Students are always looking for that next book to read. After looking over the options of tools to try I decided to use Smore for thing 13.  I created 2 book recommendation posters using Smore, then I added a new page to my Weebly website and embedded the flyers. My goal will be to eventually get the students to create their own book recommendations using Smore. Here is a link to my site and the 2 "Smores"that I have created for it up to this point.

I was a little skeptical about using Smore at first because of the structured layout. However, I really don't want anything complicated because as I mentioned earlier, I am having trouble keeping my "showcase" page updated because it is a lot of work. I think by using Smore, it won't take much work on my part to create the recommendations, which will make it more likely that I will be able to keep it updated. Plus it grabs the readers attention and certainly serves its purpose. On my next flyer I am going to use the video option which hopefully will be even more appealing for the reader. The video might also be a better option for the younger readers as well.

In closing, I am very excited about my new addition to my website. I truly feel that this will not only meet the need of my users, but also increase the flow of traffic to my site (who knows they may discover something else useful while they are visiting :) ). The only area of concern for me at this point is that Smore only allows a limited number of flyers before they charge. I guess I can hope that that becomes an issue, because that will mean I am having success!


Monday, December 29, 2014

Thing 12

Wow! I loved this assignment. In fact this might be a two part post for me as well because there are some things that I have explored, but want to be able to use with a class and won't have the opportunity until after break. I spent several hours and days looking go through Karen Bosch's Slidshare. If you have not looked this over and you are using IPADs in your classroom, this is a must view Slideshare. I have more ideas and apps that I know what to do with.

While watching Karen's Slideshare, I previewed all the free apps that I thought would be a good fit with some of the lessons that I do with classes grades K-6. I  first started with the paint and draw apps. Kindergarten is my only scheduled class and I work with them a lot. Since most of them can't write or even recognize their letters at the beginning of the kindergarten year it is hard to get them to do much more technology wise than KidPix on the computers. When I started the year, I was trying to get them on the IPADS more than the computers since they didn't need to login and it was more intuitive. However, the app that I was relying on most was DoodleBuddy and I found that it was not very reliable. I can't always get the entire page to clear fully and lots of time it completely freezes on the students. So, I was very excited to explore some new drawing apps. The two apps that I explored were "Wow Paint" and "Hello Crayons". Both of these were simple and straight forward, but did not include a text option. However, I did explore the "A+ Signature" App that I can use to have them write their name on their work, which I think is pretty basic as far as app smashing goes. Once the students get a little more skilled I could also have them create and draw in "Hello Crayons" or "Wow Paint" and then have them add their work to "PicCollage".  I loved the idea of having them draw a picture in the drawing apps then going to Pic Collage and creating a poem with their drawing or adding information about their field trip. I could see having my Kindergartners draw a picture of an animal they researched on PebbleGo with "Hello Crayons", then going to "PicCollage" and adding a fact that they researched. They could also add a fact using "A+ Signature".

After exploring the Paint and Draw apps, I moved onto the next section of the SlideShare, which was Photo Apps. Wow, there are a lot of cool photo apps! Many are a lot alike, but I tried out some new ones that I wasn't familiar with. Again, I only viewed the free ones. I started with "Orange Camera", which allows you to draw on your pictures. I thought this would be a nice feature if you were doing a science experiment and you wanted to label parts of your experiment (observations, parts of the image of study, steps. etc). Another option on the App is to change the appearance of the image. So it can be seen as black and white, vintage, etc. One of my favorite options is that you can view an image on ruled paper and the image is sketched on the paper in black and white. I thought this could be an excellent way to create story starters. Students could take images and then exchange with a partner and they could use that image to start a story. I also explored "Face Stamp", which I thought could be really fun to use with all of our geography projects that we do throughout the grades. We could create a higher level thinking project where students had to guess where they are sending a letter to, based on clues from that location. The students creating the clues would really need to do some research to prepare the clues and then the students trying to determine where their stamped letter was going to would need to do some research to determine the significance of the clues. The last photo app that I used was "Animoto". I use "Animoto" on the computer all the time and I was excited to know that there was a free app. It was super easy to use and I built a powerful and beautiful presentation of my students having fun at our "Holidays in the Library" after-school program. I was so excited to share it on the library website, the only problem is that it doesn't provide you with html embed code, just a link. That was a little disappointing because it isn't as appealing to have a link on your webpage that takes them off your site. I was able to share it on Twitter though, which is more conducive to having a link. In case anyone is interested in my Animoto, here it is: https://animoto.com/play/eRncllLIrDrrY30dl1LWvQ. One more final note on the sharing options, you are able to download the video if you purchase a monthly or annual membership.

Finally, when it came to the recording Apps, I explored many of the Apps. I was very intrigued by the 30hands app. I could see this app as a multipurpose app. I think it would be very useful for me or any teacher to create  something almost like a screencast to explain how to use different apps on the IPAD. I could also see it as a great tool for students to create short and meaningful presentations on topics within the curriculum. I am definitely, going to challenge myself to use this app with at least one class this year. I also explored ScreenChomp which seems like a great tool for math, but I was struggling with how I might find a use for it in the library. Then I thought, since I am able to add pictures from the photo library I could take a screenshot of the Overdrive website and give troubleshooting tips when students gets stuck on certain steps. Here is my example: http://www.screenchomp.com/t/boIcRPeQy. I have also added it to my website: http://lakegeorgelmc.weebly.com/resources.html.

The last recording App that I played around with was "AudioBoo" and I already have a project lined up with the 6th grade classes using it. The sixth graders are working on literary essays. Once they write their essays they are going to record themselves reading the essay with Audioboo and then they are going to create QR codes that link to their recording. We are then going to post their QR codes in the library so that when students are considering books to read they can listen to the literary essays on specific titles that the students in the 6th grade read and wrote about.

Overall, this was my favorite "thing" that I have completed so far and I will be continually revisiting Karen's slideshare for ideas. I look forward to reading others ideas and being inspired by all of you as well.


Tuesday, December 16, 2014

Thing 11 continued

Last night we hosted our parent "Hour of Code" night. As mentioned in a previous post our enrichment teacher has been teaching code with each of the grade levels in our elementary school. We wanted the parents to experience what their children were doing at school and share with them the exciting opportunity that coding could provide for their children.

In deciding how this was going to be set up, our enrichment and technology coordinator, along with our principal decided that it would be best to do it on a night that there was a PTSO meeting going on so that we would already have an audience. The parents from the PTSO meeting then attended the "Hour of Code" afterwards. Everyone came to the library after the meeting (students included) and we used the site that we use at school with the children called code.org. There are some wonderful videos on the site and we shared one of those videos in the beginning. Parents learned about the current and future job market that is available for people that can code. Several parents commented on how valuable they saw this being and wanted to know how this was being carried out once the students went to high school. It was really nice that they were able to see the benefits and showed interest in it.

Once they were finished watching the video the parents began one of the courses that the students take at school and they were able to receive a certificate at the end of the hour. I walked around and helped parents and teachers, along with members of the technology department and the enrichment teacher. It was really fun, challenging and rewarding for both parents, and students that attended. I think it was worthwhile and I hope that we are able to offer it again in the Spring when it isn't so close to the holidays and more families can attend.

If anyone wants to learn more about how we hosted our parent night or code.org, I would be happy to share more information with you. It is really exciting and I feel lucky that we are able to provide coding at our school.

Wednesday, December 10, 2014

Thing 11: Coding

Coding

This was a very scary "thing" for me. I remember taking web design classes in college and I would be good up to a certain point and then "the wheels would fall off".  At our school the enrichment teacher does code with all the students in the elementary grades and I have to admit, I hadn't done much to learn it myself. So, this project although terrifying was good for me. 

I started out by doing something small. I went to "codecademy" and tried making my name different colors and bounce up and down. I was happy that I was able to do it and understood most of what I was doing while creating it. The part I struggled with was trying share it. Unfortunately, I learned that I couldn't "simply" share it, so I just have the html code (<!DOCTYPE html>

<html>  <head>    <script type="text/javascript" src="//code.jquery.com/jquery-1.10.2.min.js"></script>    <script type="text/javascript" src="http://s3.amazonaws.com/codecademy-content/courses/hour-of-code/js/alphabet.js"></script>  </head>  <body>    <canvas id="myCanvas"></canvas>    <script type="text/javascript" src="http://s3.amazonaws.com/codecademy-content/courses/hour-of-code/js/bubbles.js"></script>    <script type="text/javascript" src="main.js"></script>  </body></html>)

After feeling a little braver, but still fairly uncomfortable, I decided to email the enrichment teacher at our school and use the coding site that our students use, called Code.org. It is a one hour code program that uses blocks to code. You learn terms such as programming and looping. It was fairly easy to use and "Elsa and Ona" making snowflakes made it much easier to understand visually. However, the trouble that I had with it was that if you got stuck you weren't able to move on and there were not any suggestions or help buttons to give you hints or indicate where you had trouble. However, the kids at our school seem to love it and I tried it with my own kids and they loved it!

My challenge was where to go from there. I run on a flex schedule in my library and scheduling becomes an issue, so I was hesitant to ask teachers for additional time to push into their classrooms when they are already coding with our enrichment teacher. Then I had a bright idea! I had been toying with the idea of maker spaces and wondering what that might look like in our library. I truly feel that the library is an extension of the classroom and when I utilized maker spaces I wanted it to follow that philosophy of an extension of learning.  So I thought it would be great if I could have a maker space section of the library for coding. Students have already learned how to code and this would be a place where kids could tinker around with their new found skills through various coding sites and programs that were shared on the "Cool Tools" Wiki. However, when I pitched the idea to my principal there was some reservation, for valid reasons. My principal suggested having after-school, which I am going to make available at the start of the new year. I hope see a long trail of students coming into the library after-school. 

So, what's next? Next week my enrichment teacher and technology coordinator for our school are putting on a night of code at our school. I am going to attend and help in anyway that I can. I am very grateful for this opportunity and am excited to see what I learn from it and most importantly what the students are able to learn! Hopefully, this will give me ideas for coding after-school in the library.